Unlock Stunning Photos: Master the Art of Studio Lighting Kits!
Lighting is the heartbeat of photography; it's what transforms a simple image into a captivating work of art. Whether you're a budding photographer or a seasoned pro, understanding the importance of lighting can dramatically enhance the quality of your photographs. This article will delve into studio lighting kits, essential tools that can elevate your photography game. With the right lighting, you can manipulate shadows, highlight features, and create an atmosphere that resonates with your audience. Join us as we explore the components, significance, and techniques of using studio lighting kits effectively.

Understanding Studio Lighting Kits
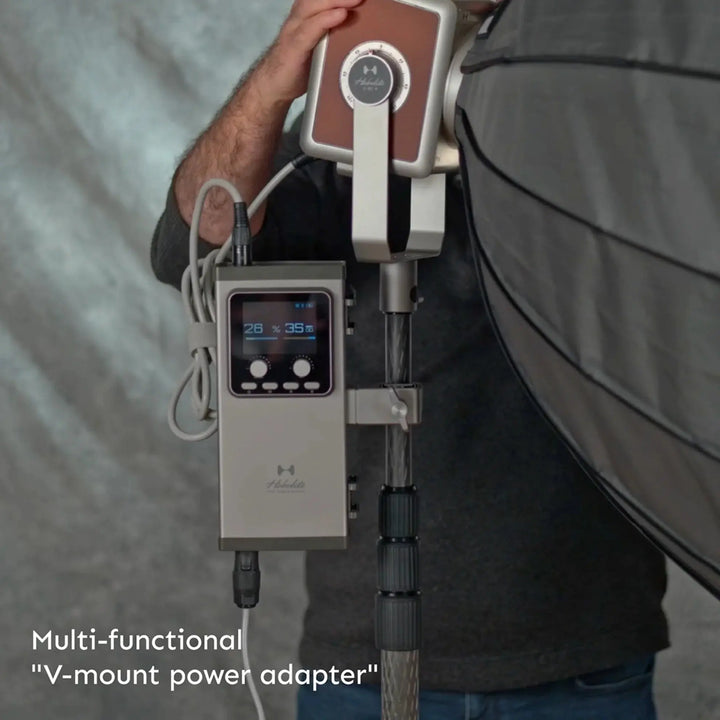
A studio lighting kit is a collection of lighting equipment designed to help photographers achieve optimal lighting conditions in a controlled environment. Typically, these kits include various types of lights, such as continuous lights or flash units, along with modifiers like softboxes, umbrellas, and reflectors, and sturdy stands to hold everything in place. The primary purpose of a studio lighting kit is to provide consistent and adjustable lighting that can be tailored to suit different photography styles, whether it's portrait, product, or fashion photography.
Studio lighting kits come in several configurations, each catering to different needs. For instance, a basic kit might include two softboxes and a backdrop, perfect for portrait photography. In contrast, a more advanced setup could feature multiple light sources, specialized modifiers, and even background lighting for creative effects. The choice of a lighting kit depends on the photographer's style and the types of shoots they plan to undertake. Understanding these components is crucial for making informed decisions about which kit will best suit your needs.
The Importance of Studio Lighting in Photography
Studio lighting is not just about illuminating a subject; it plays a vital role in achieving professional-looking photos. Proper lighting affects exposure, contrast, and color accuracy, which are fundamental elements of a great image. For instance, when a photograph is well-lit, it enhances the subject's details and textures, creating depth and dimension. Conversely, poor lighting can lead to dull, flat images that fail to capture the viewer's attention.
Consider the concept of exposure: too much light can wash out details, while too little can obscure them. Contrast is another critical factor; it helps to define shapes and separate subjects from the background. High contrast can evoke drama and intensity, while low contrast can create a soft, ethereal feel. Additionally, color accuracy is essential for realistic images; incorrect lighting can distort colors, leading to unappealing results. Ultimately, mastering studio lighting allows photographers to control these variables, ensuring their work resonates with viewers.
How to Use a Studio Lighting Kit
Setting up a studio lighting kit may seem daunting at first, but with a few simple steps, you can create a professional-grade environment. Begin by selecting a suitable space where you can control ambient light. Position your primary light source at a 45-degree angle to the subject to create flattering shadows. This setup will enhance the subject's features while providing a natural look.
Next, adjust the intensity of your lights. Many kits come with dimmable options, allowing you to fine-tune the brightness to achieve the desired effect. Experiment with different heights and angles to see how they affect the light's quality. Using modifiers like softboxes or umbrellas can soften harsh light, producing a more pleasing and even illumination. Don’t forget to incorporate fill lights to minimize shadows and maintain a balanced exposure.
Common Techniques for Effective Lighting
There are several lighting techniques photographers can employ to enhance their images. One popular method is three-point lighting, which involves using a key light, fill light, and backlight. This setup creates depth and dimension, making subjects pop against the background. Soft lighting can also be used to create a dreamy, flattering effect, ideal for portraits.
Conversely, high-key lighting produces bright images with minimal shadows, often used in fashion photography, while low-key lighting emphasizes shadows and creates dramatic effects—perfect for moody portraits. Each technique has its place, and experimenting with them can reveal unique and stunning results.
Key Takeaways on Studio Lighting Mastery
In conclusion, mastering the art of studio lighting kits is essential for any photographer looking to elevate their craft. By understanding the components of lighting kits, recognizing the importance of proper lighting, and learning effective techniques, you can significantly improve your photography. Don’t shy away from experimenting with different setups and styles—each click of the shutter is an opportunity to create captivating images that tell a story. So gather your lighting kit, unleash your creativity, and enjoy the transformative power of great lighting!


